Collection
“Collections” is a function within “Artworks” for you to group your work. In your art showcase, you can add collections to your showcase for clients to view. In “Collections” the artist is able to group works with similar themes together, which makes for a cohesive viewing experience.
1.Add New
To add a new collection, click “Add new” in the top right hand corner of the Collections dashboard. Next, fill out the required fields (*). Here you can choose to make your collection private or not, which will keep it from reaching the RevArt website or your own showcase site for viewing.
a.Adding and Removing Images to Collections
You will see two panels: “Pieces” and “Pieces in Collection”. The left hand panel (Pieces) include all of the pieces of artwork that you have uploaded to the RevArt SAM system. The right hand side panel is of pieces you have chosen to add to the new collection. To add pieces select pieces from the left panel (by clicking the little box next to the image), when you have selected all the images you want to move to the new collection, hit the “Select” button located in the middle of the two panels.
To remove images from the collection, select the images you wish to remove in the right panel and then click “Unselect”. then click “Unselect”.
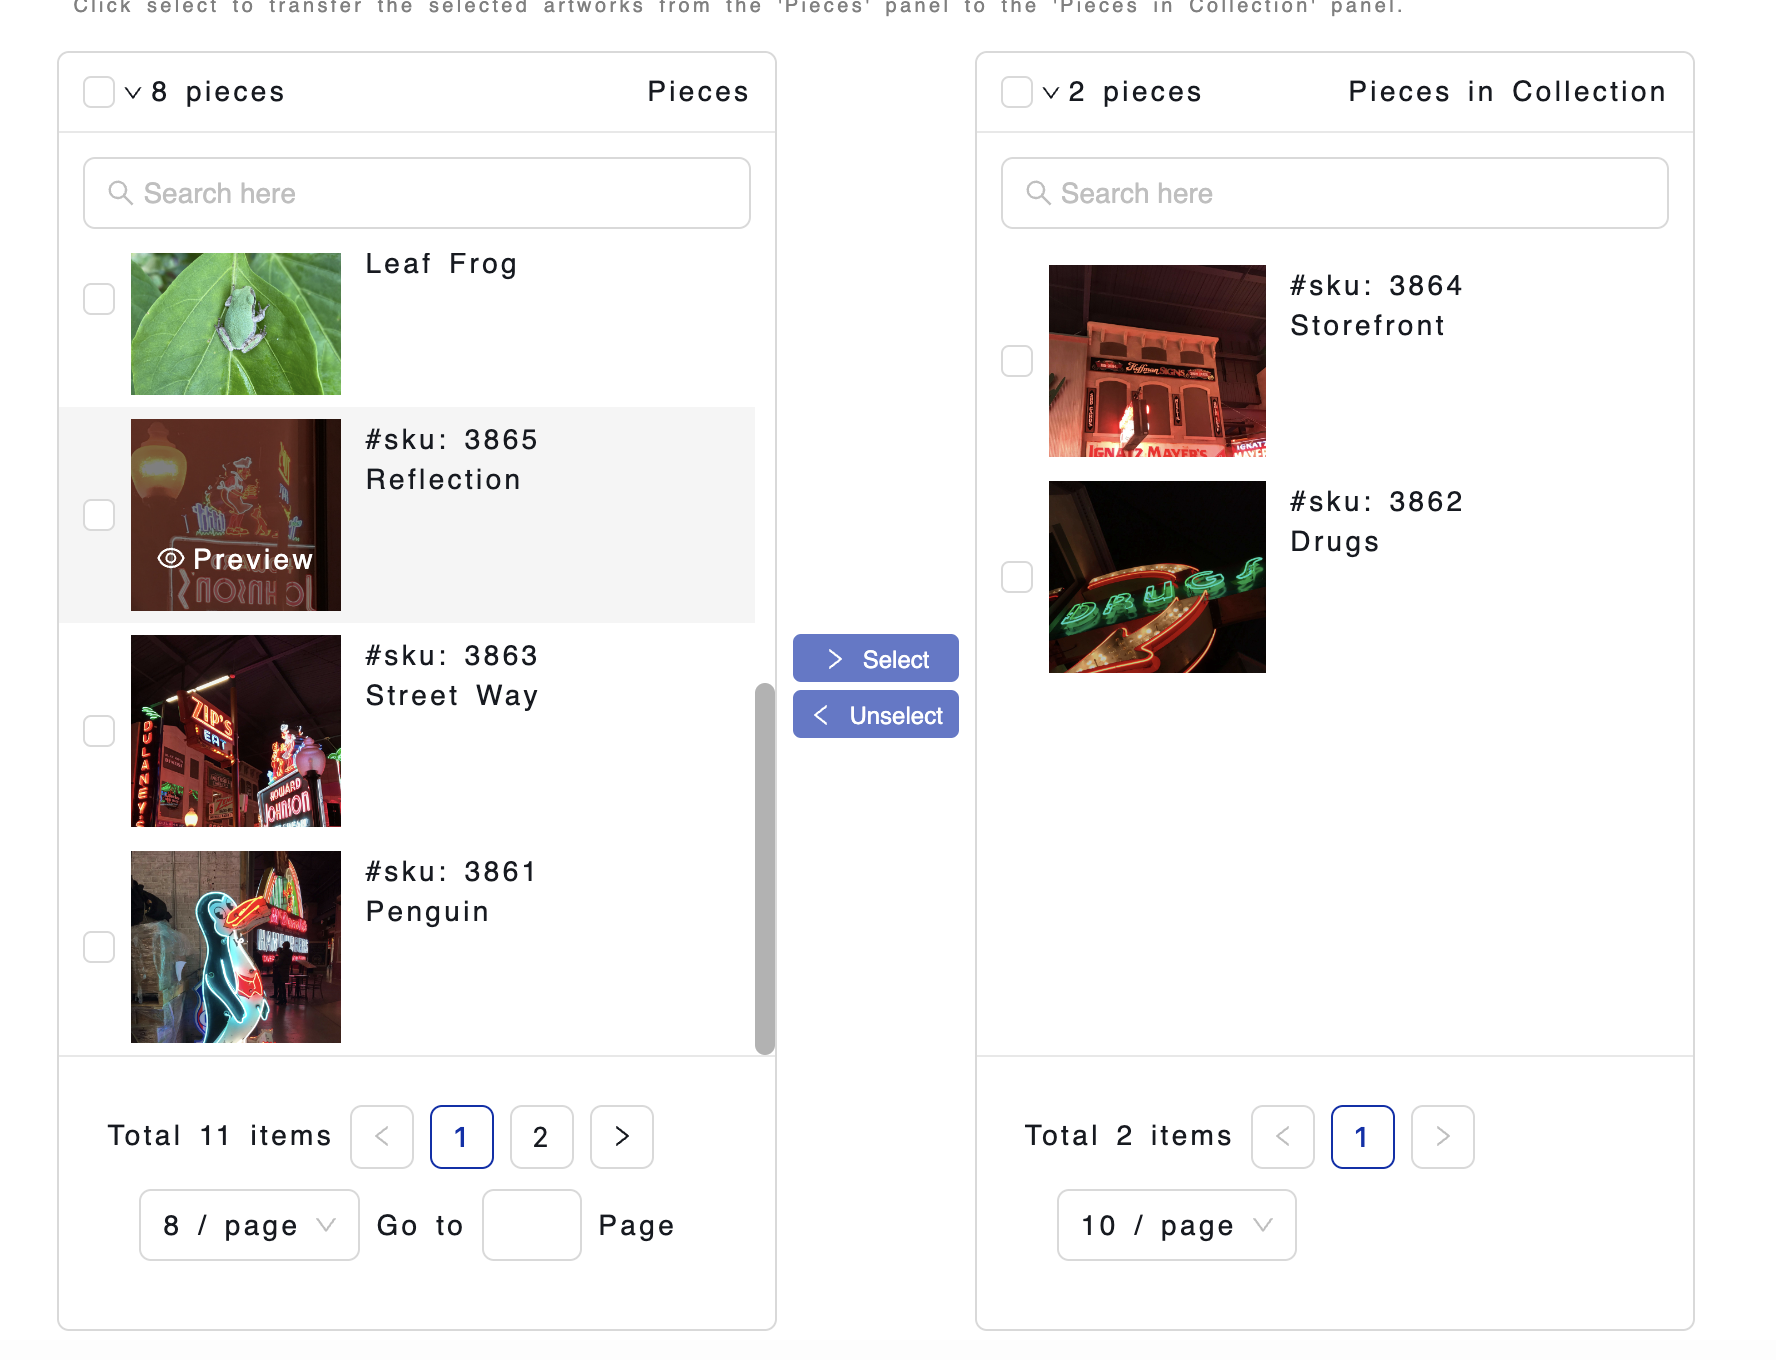
You can use the filter options to help narrow down your search for pieces.
You can also use the search bar to find the specific pieces.
b.Arrange Artworks
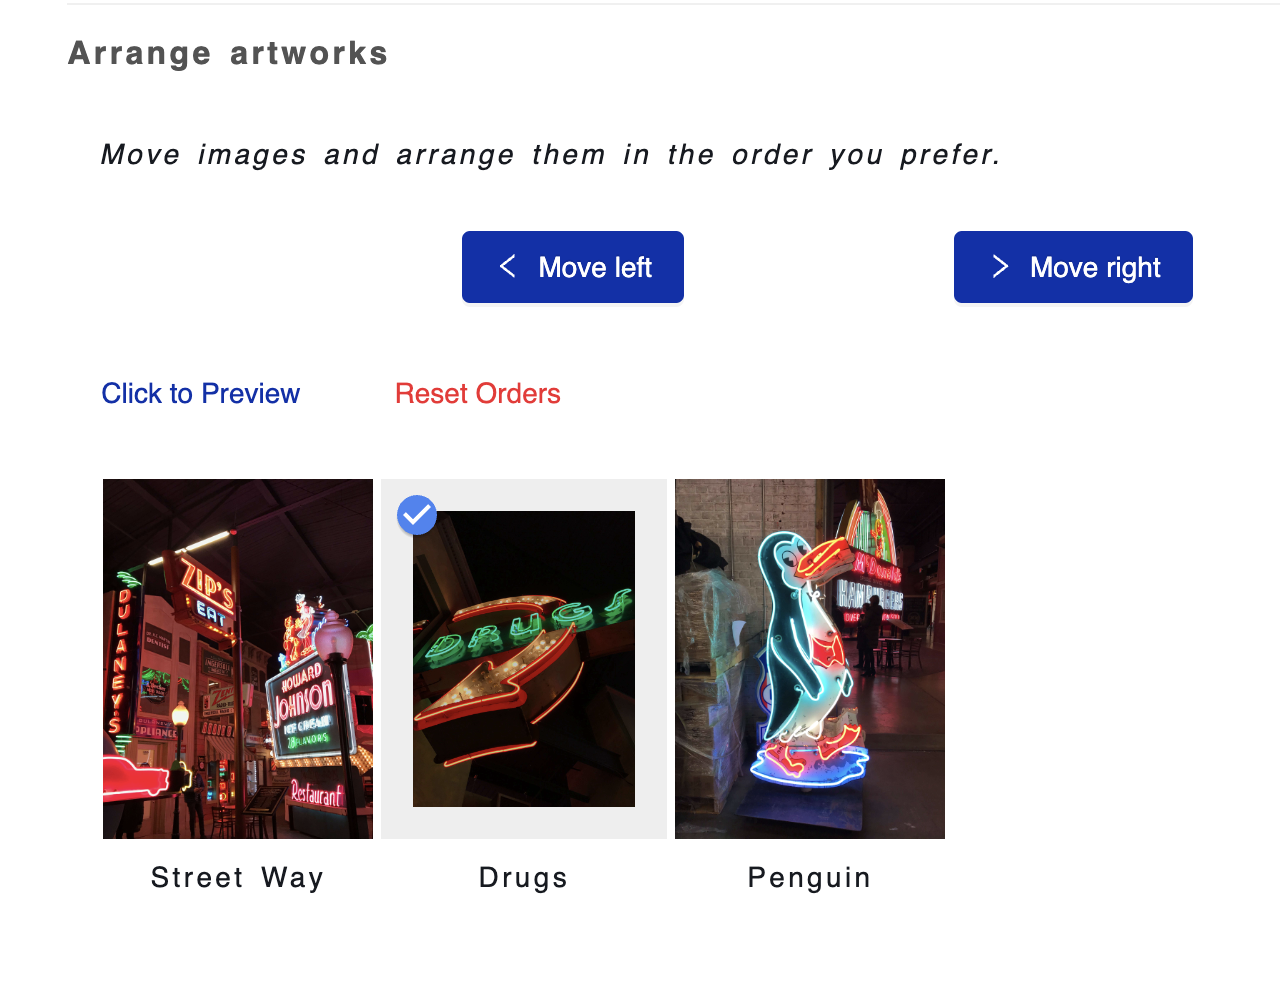
After you have selected the images of the new collection, you can arrange the pieces so they will display in the order you want them to when the viewer goes to look at your collection. Simply hover over the image you want to rearrange and then click the circle that appears in the left hand corner of the image - this will select the image. Then use the “Move left” and “Move right” buttons to shuffle the image around. You can “Click to Preview” to see what the image will look like to the viewer on your showcase. You can also start from scratch and reset the order of the images if you are unhappy with your changes.
Once you have made your changes, click “Create Collection” on the bottom right corner.
2.Edit
To edit a collection, first select which collection you want to make changes to (if you have multiple) and click “Edit” at the top of the collection. This will bring you to a screen that gives you the full editing capabilities of when you were first creating the collection (see the section about Adding New for more details).

3.Delete
If you choose to delete a collection, click the “Delete” button at the top of the desired collection. The system will then ask you to verify that you want to delete the collection permanently.
4.Set as Private
By clicking the “Set as Private” button, this prohibits the collection from being available for viewing on your showcase or RevArt.
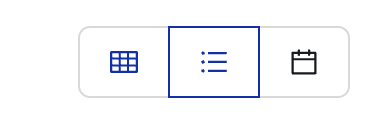
5.Dashboard View
Grid View
The far left icon is the default grid view, which will display a card for each piece.
Column View
The middle icon will show a column view, which will display more information about each piece.
Calendar View
The far right icon will provide a calendar view.
6.Sort
This function allows you to organize and view your pieces according to a certain specification. Next to “Sort,” click the drop down menu arrow and select how you would like to sort your pieces.
7.Export
1. Export to Excel
Click “Export” then “Export to Excel,” then select the field you want to export information about, then click “Export”. This function will provide you with an Excel sheet with information on your pieces. This Excel file will provide you with all of the current information about your pieces in a simple and condensed form.
2. Export to Inventory Report
To see what pieces are in the RevArt system’s inventory as a printable catalog, click “Export” then “Export to Inventory Report”. This will bring you to a separate window that will show all of your pieces, along with their information.