Exhibition
Introduction
It is always exciting when an artist has an upcoming exhibition, SMART Manager has a way for you to organize your work easily. For artists, life is chaotic and if you are busy with exhibitions, that means your work is spread throughout different locations which can be hard to keep track of. The Exhibition tab in SAM is a way to keep track of your exhibition artwork.
Exhibition Navigation
In the SMART Manager, under the “Artwork” tab, select “Exhibitions.” This will take you to the exhibitions dashboard where you can see all of your exhibitions and create new ones.
1. Create an exhibition
Step 1: Exhibition InfoTo create a new exhibition, click “Create exhibition”

Here you will input all of the exhibition information, make sure you fill out the required fields (*). We have fields for information including:
- Exhibition name
- The type
- Location
- Important dates
- Curator
- Exhibition website
- Exhibition description
Once you are done filling out the information, click “Save & Continue” in the bottom right to add exhibition pieces.
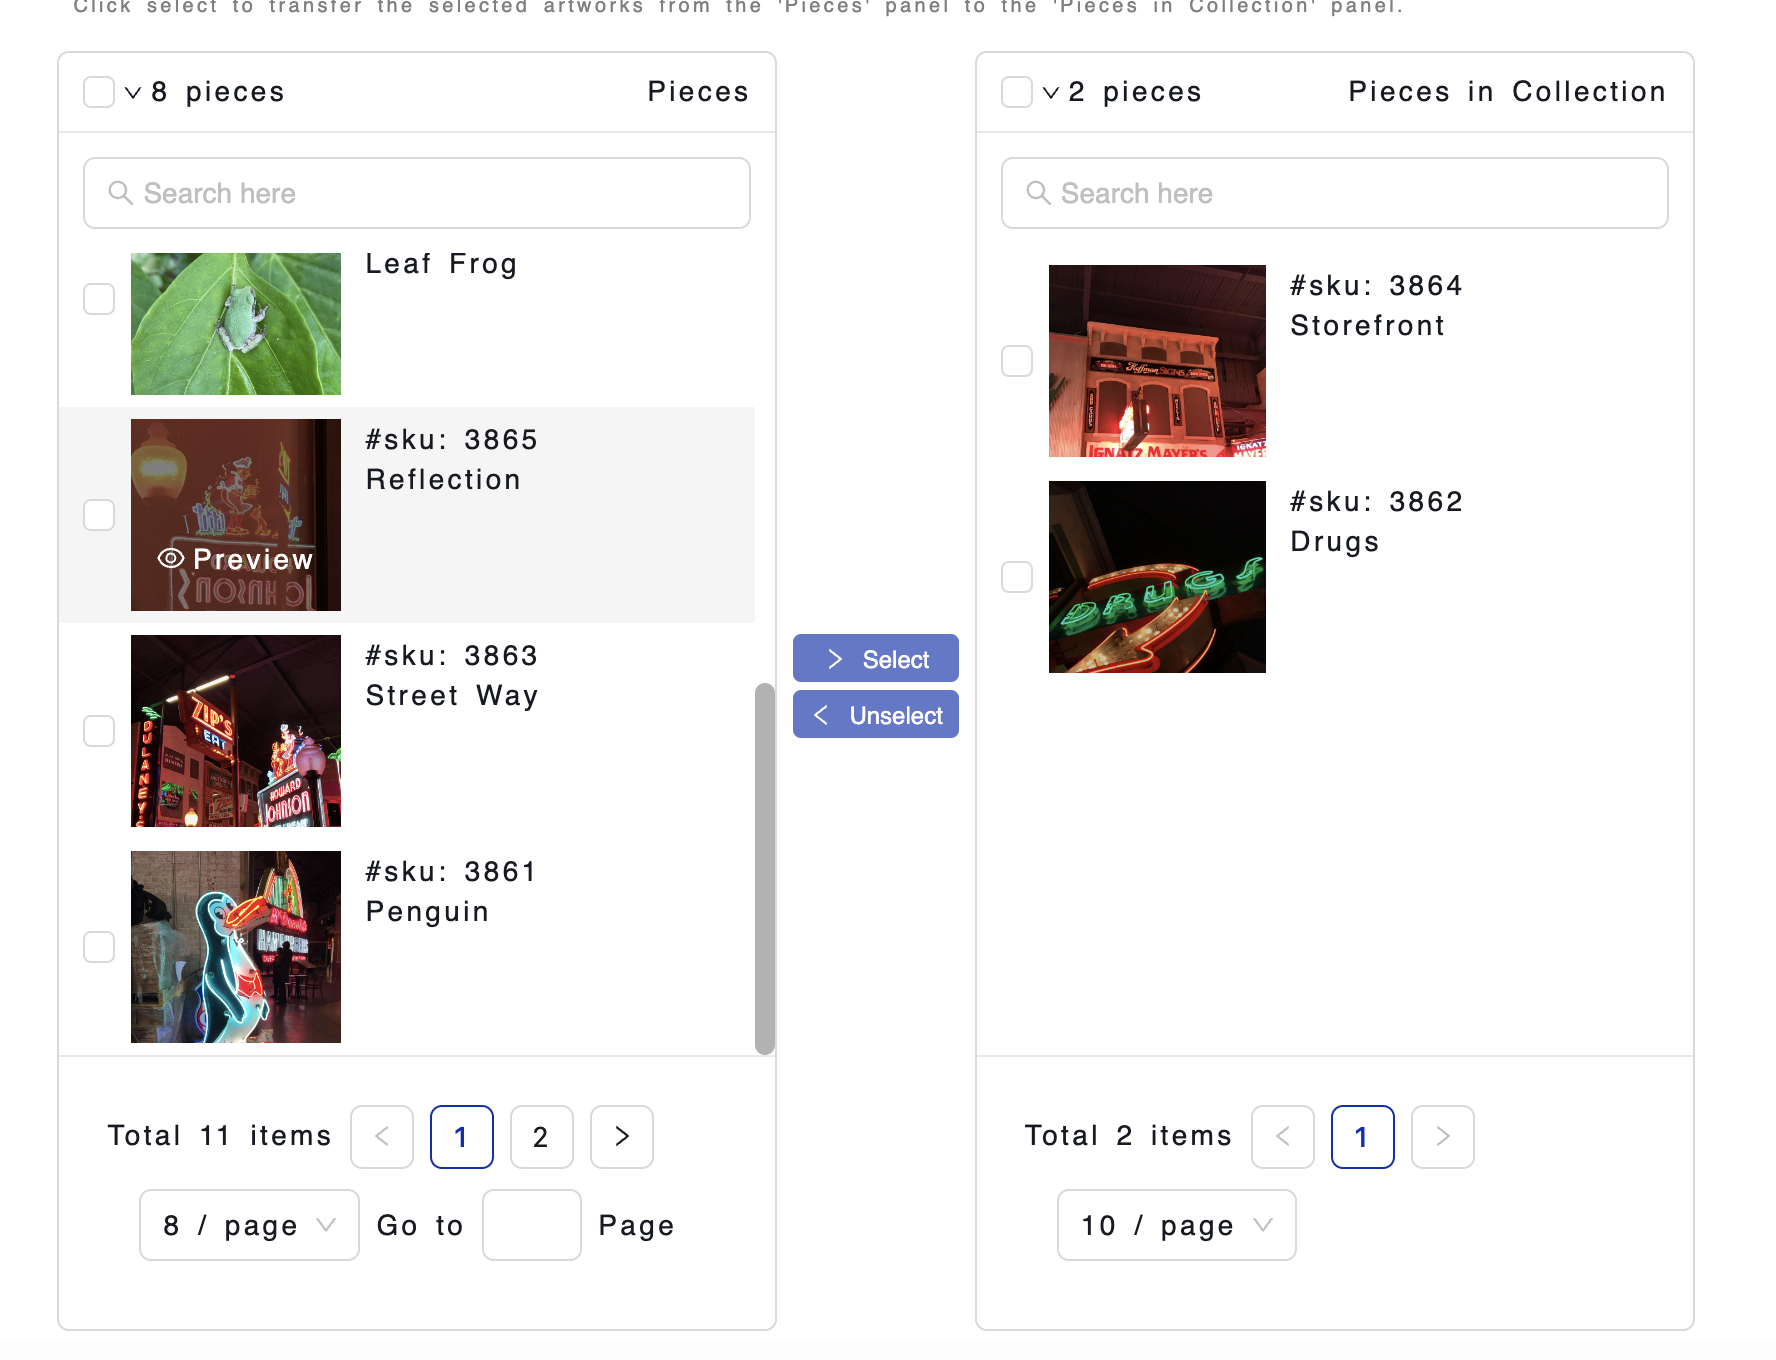
Step 2: Select ArtworksYou will see two panels: “Pieces” and “Pieces in Collection”. The left hand panel (Pieces) include all of the pieces of artwork that you have uploaded to the RevArt SAM system. The right hand side panel is of pieces you have chosen to add to the exhibition. To add pieces select pieces from the left panel (by clicking the little box next to the image), when you have selected all the images you want to move to the new collection, hit the “Select” button located in the middle of the two panels.
To remove images from the collection, select the images you wish to remove in the right panel and then click “Unselect”.
You can use the filter options to help narrow down your search for pieces.
You can also use the search bar to find the specific pieces.
When you have selected all desired exhibition works, click “Save” in the bottom right corner. This will add your newly-created exhibition and take you back to the exhibition dashboard.
2. Edit an existing exhibition
Once an exhibition is created, you still have the opportunity to make edits. Click “Edit” next to the exhibition you would like to change.
This will allow you to edit the exhibition info and edit the artwork. When you have made all of your changes hit “Save”.

3. Deleting an exhibition
Once an exhibition is created, you still have the opportunity to make edits. Click “Edit” next to the exhibition you would like to change.
This will allow you to edit the exhibition info and edit the artwork. When you have made all of your changes hit “Save”.
4. Exporting an exhibition to Inventory report
If you would like a catalog reference that can be printed out of a specific exhibition, click “Export” next to the desired exhibition. Then click, “Export to Inventory Report”. This will provide you with a compiled document that includes all of the work you have included in the exhibition.